
Wow, it’s been a while since I’ve done a project – HEY THERE!
I was on the lookout for a tall dresser or cabinet to go underneath our wall-mounted TV so when I saw these 2 cabinets at the thrift store I figured they had some potential, especially when they were only $14 each!
Two full days of stripping, bleaching, sanding, patching, painting, white-washing and they’re finished!

The biggest difference was adding legs which I’m so happy about!
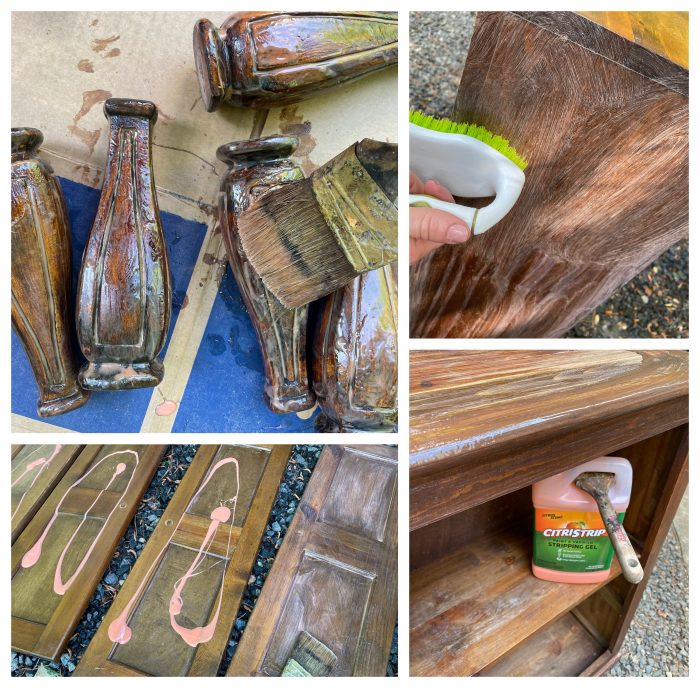
I started off by stripping the finish off all the pieces (except for the inside of the cabinets). It was so much work and very messy. I used a wire brush for most of it and then actually hosed everything down with water and dish soap and then set everything out to dry.

Once everything was dry I filled a few large holes that were on the back panel and other random holes and sanded smooth.
Not pictured, I used outdoor bleach to wipe on all the surfaces (except for the inside of the cabinet) to really brighten up the color – it worked great!

I actually found these legs off a janky table someone had made by gluing/nailing them onto a flimsy piece of plywood – yup.. found the table behind a dumpster a few months ago and was saving the legs for something – couldn’t have planned this better! The legs appeared to have been cut from larger legs and the tops/bottoms weren’t flat/parallel so I marked the centers of each and stuck them on my lathe to clean up and make them all flat and the same height. I drilled holes in the center for attaching to the cabinets.

I screwed the legs on from the inside of the cabinet while my husband held them in place for me. I also added some wooden knob pulls to the cabinet doors with glue/screws.

The next morning the cabinets were dry and ready for some paint – first I sanded the cabinets/doors as they were a bit rough from all the wire brushing.

I did 2 coats of paint on the inside of the cabinets – it made a huge difference!
I used the same paint from the inside to make a “white-wash” for the rest of the cabinet/doors – I love how it changed the orange-tone into a subtle grayish-tone.

I spray-painted the hardware to blend in with the color of the cabinets better.

I’m pretty happy with how they came out!


